
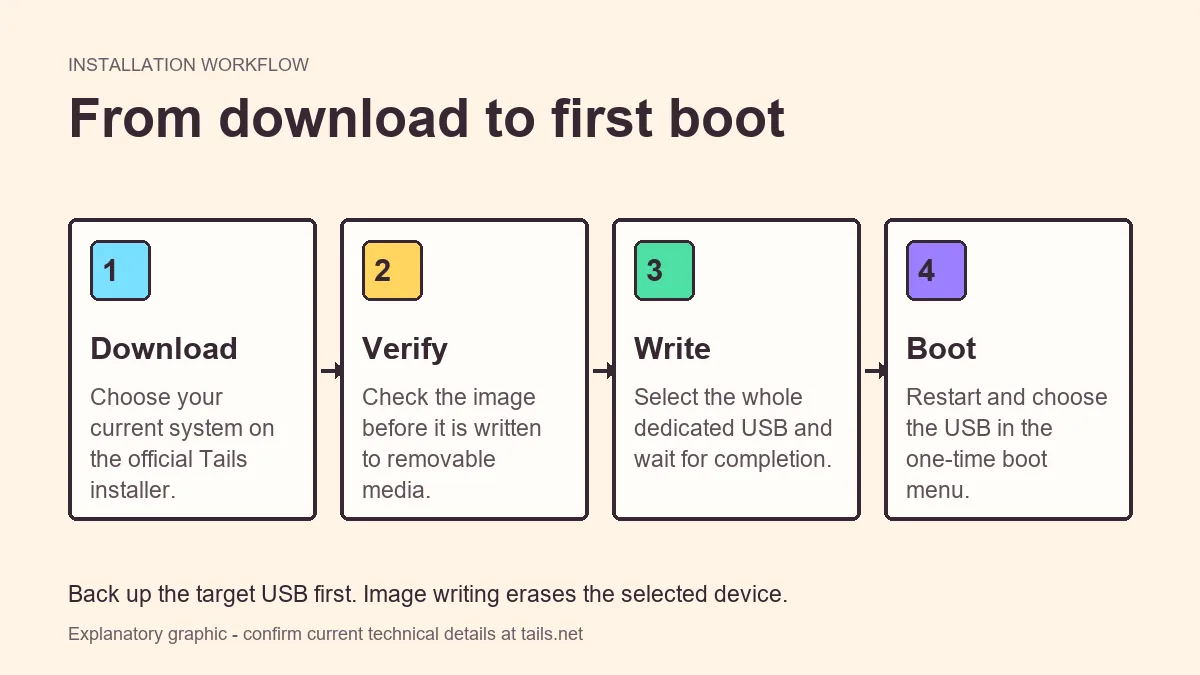
From Windows, open the official Tails Windows installer, download and verify the current USB image, write it to the entire removable drive with the recommended tool, then restart and choose the USB from the one-time boot menu.
Prepare Windows and the USB drive
Copy every needed file off the USB because image writing replaces its partition layout. Disconnect other removable disks to reduce the chance of selecting the wrong device.
Keep enough free space on the Windows system drive for the downloaded image and temporary browser data. Use an administrator account when the writer requests permission.
- Back up the USB elsewhere.
- Note the USB brand and capacity.
- Close tools that are scanning or mounting removable drives.
- Download only from tails.net.
Create the Tails USB on Windows
Use the current tool named by the official instructions. The sequence below describes the decision points without freezing a third-party tool version.
- 1
Download the USB image
Use the official Windows route and save the image in a location you can identify.
- 2
Verify the file
Complete the official verification before opening the writer.
- 3
Run the writer
Approve the administrator prompt, select the image, and confirm the USB by name and capacity.
- 4
Wait and eject
Allow writing and validation to finish. Use safe removal if the tool or Windows requests it.
After writing Tails, Windows might not understand every partition. Do not format the drive before testing whether it boots.
Boot the Windows PC into Tails
Restart with the USB connected and open the one-time boot menu as the manufacturer logo appears. Choosing Windows Boot Manager simply returns to Windows; choose the removable USB or its UEFI entry instead.
- Common boot keys include F12, F9, F10, F11, and Esc.
- Use Restart when Windows fast startup complicates a full shutdown.
- Connect the USB directly rather than through a dock.
- Do not change permanent boot order unless necessary.
Windows-specific problems
Security software can slow a large download or inspect the image, but it should not be disabled casually. A format prompt after writing usually reflects the new partition layout rather than a failed installation.
| Problem | Likely cause | Next action |
|---|---|---|
| USB not visible in writer | Permission, cable, or port | Reconnect directly and reopen as administrator |
| Windows asks to format | Unrecognized Tails partition | Cancel and test boot |
| Windows starts normally | Internal disk selected | Use one-time boot menu |
| Writer reports failure | Bad download or USB | Verify, redownload, or test another drive |
Confirm the Windows installation end to end
After the first successful boot, restart into Windows and then boot Tails again. This confirms that the PC can return cleanly to both environments and that a one-time boot selection did not alter the normal Windows startup path. Record the manufacturer's boot key and the label used for the USB entry.
Windows updates and firmware updates can change startup behavior. If the USB disappears after an update, do not immediately rewrite it. Test another direct port, reopen the one-time boot menu, and confirm the drive on another compatible computer. Rewriting is appropriate only after the image and device are the likely failure point.
Protect any BitLocker recovery information before changing firmware settings. A firmware security change can trigger a recovery prompt in Windows even when the internal disk was not modified. Prefer the official Tails startup guidance and temporary boot selection over broad, undocumented changes to Secure Boot or storage settings.
- Test a second boot after returning to Windows.
- Save the exact boot key and USB entry label.
- Keep BitLocker recovery information available.
- Recheck startup after firmware updates.
- Avoid disabling security controls without current guidance.
Maintain a dependable Tails OS for Windows workflow
A dependable Tails OS for Windows workflow begins before the image writer opens. Keep BitLocker recovery information available, disconnect unrelated removable storage, and identify the target USB by both brand and capacity. Download through the official Windows route and complete verification before granting a writer administrator access.
After creating Tails OS for Windows boot media, cancel any Windows prompt that offers to format or repair unfamiliar partitions. Restart, open the one-time boot menu, and select the removable UEFI entry. Then return to Windows and repeat the cold boot once, confirming that neither the normal Windows startup path nor the Tails USB depends on a permanent boot-order change.
Review the Tails OS for Windows process again after firmware, security-policy, or major Windows updates. If external startup stops working, test the port and boot menu before rewriting a known-good USB. Use another compatible computer to separate a drive problem from a Windows PC firmware problem.
- Use official Tails OS for Windows download and verification instructions.
- Protect BitLocker recovery information before firmware changes.
- Cancel automatic partition format or repair prompts.
- Record the working one-time boot key and USB entry.
Tails for Windows FAQ
Can I install Tails as a Windows program?
No. The normal setup writes Tails to removable media and boots outside Windows.
Will creating the USB erase Windows?
Not if the removable USB is selected correctly. Selecting the internal disk would be destructive, so verify the target.
Should I format the USB when Windows asks?
No. Cancel the prompt after writing Tails and test whether the USB boots.
Can BitLocker block Tails?
Tails boots separately from Windows, but firmware settings and device policy can affect external startup. Consult current official guidance.
Why does Windows Defender scan the Tails download?
Security software can inspect any large downloaded file. Do not treat a scan notification as either proof of danger or proof of safety. Keep the official source and Tails verification result as the release-integrity evidence, and investigate any specific security alert before proceeding.
Can I create the USB on one Windows PC and use it on another?
A correctly written Tails USB is removable, but the destination computer still needs compatible architecture, firmware, graphics, and network hardware. Test that exact computer and review current known issues before depending on it.
Why is the USB drive letter gone after writing Tails?
Windows may not assign familiar drive letters to the new partition layout. This does not by itself indicate failure. Cancel format or repair prompts, restart, and test the removable boot entry before changing the drive.
Technical facts and downloads should be confirmed against the official Tails documentation. This independent guide does not host or modify Tails images.