
Shut down the computer, connect the finished Tails USB directly, power on, press the manufacturer's one-time boot key, and select the USB or its UEFI entry. If the normal operating system starts, restart and try the boot menu again.
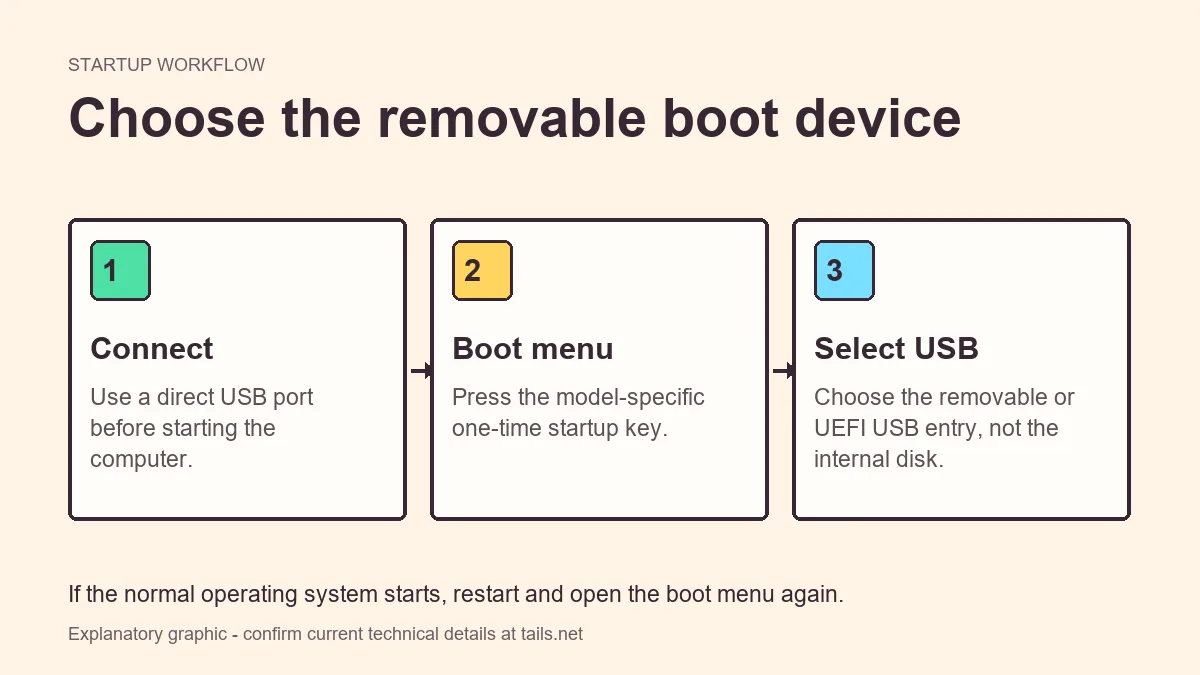
Before opening the boot menu
Finish the image-writing process and eject the USB cleanly. Connect it directly to the computer rather than through a hub, dock, monitor, or keyboard because some firmware cannot initialize those paths early enough.
A full shutdown is more reliable than resuming from sleep. On Windows, fast startup can also make firmware access harder, so use Restart when shutdown behavior is unclear.
- Use a direct port.
- Disconnect unnecessary external drives.
- Keep the computer connected to power.
- Know the USB brand or capacity so you can identify it.
Open the one-time boot menu
The key depends on the manufacturer and model. Common keys include F12, F9, F10, F11, Esc, or a dedicated recovery button. Macs use their own startup selection process.
- 1
Connect the Tails USB
Use a direct port while the computer is powered off or before restarting.
- 2
Start and tap the boot key
Press the key repeatedly as soon as the logo appears. If Windows or macOS loads, you were too late or used the wrong key.
- 3
Select the removable device
Choose the USB name or its UEFI entry. Avoid entries that clearly identify the internal disk.
- 4
Wait for Tails
The first screen can take longer than a normal installed system. Do not remove the USB.
A one-time boot menu avoids changing the permanent firmware boot order and reduces the chance of leaving the computer in an unexpected state.
Identify the correct boot entry
Firmware labels are inconsistent. The USB can appear under its manufacturer name, product name, capacity, USB HDD, or UEFI followed by a device label.
| Boot entry | Likely meaning | Action |
|---|---|---|
| UEFI: USB brand | Tails USB in UEFI mode | Usually the first entry to try |
| USB HDD or Mass Storage | Generic removable drive | Try when the brand is not shown |
| Windows Boot Manager | Internal Windows installation | Do not choose for Tails |
| Internal SSD model | Computer's internal disk | Do not choose for Tails |
Fix a missing or ignored USB
If no removable entry appears, change one variable at a time. Another direct port, especially a different USB generation, often changes firmware detection. Then confirm the USB works on another compatible computer before rewriting it.
- Retry after a full shutdown.
- Try another direct port without an adapter.
- Confirm the image writer finished successfully.
- Review Secure Boot and known-issues guidance for the current Tails release.
- Test the USB on a second compatible computer.
Black screen or startup freeze
A visible boot entry proves only that firmware found the drive. Graphics hardware, firmware, or a damaged write can still stop startup. Note whether the screen fails before or after the Tails loader appears.
Use the official known-issues documentation for model-specific workarounds. Avoid random kernel options from old forum posts unless they match the current release and hardware.
- Re-verify and rewrite the image when failure occurs on multiple computers.
- Record the graphics adapter and exact computer model.
- Remove optional peripherals.
- Check current release notes for regressions.
Create a repeatable startup routine
Once the USB boots successfully, write down the exact startup key, the label shown for the removable device, and the direct port that worked. Firmware menus can be stressful when a computer must start quickly, and the entry name may not contain the word Tails.
Practice a cold boot as well as a restart. Some computers initialize removable storage differently after sleep, hibernation, fast startup, or a full power-off. If a machine is shared, avoid changing a permanent boot order that affects other users; a one-time selection is easier to reverse and explain.
Retest after major firmware changes or when moving to another computer. A tested USB is not a universal compatibility certificate. Keep a fallback plan, and never bypass unfamiliar firmware security warnings without comparing them with current official Tails documentation.
- Record the model-specific boot key.
- Note the working UEFI entry and USB port.
- Practice a full cold boot.
- Avoid permanent firmware changes when possible.
- Retest after firmware or hardware changes.
Practice how to boot Tails from USB
The most reliable way to boot Tails from USB is a one-time startup selection that has already been tested on the same computer. Record the working key, the removable-device label, and the direct port. A drive might appear under its manufacturer name or as a generic UEFI entry, so a short note is more useful than expecting the menu to say Tails.
Practice a full shutdown before you need to boot Tails from USB under time pressure. Sleep, hibernation, Windows fast startup, and a warm restart can initialize hardware differently. A successful cold boot confirms that the firmware can discover the removable media without relying on the previous operating-system session.
If you move the drive to another computer, repeat the compatibility checks. The ability to boot Tails from USB on one machine does not prove that another graphics adapter, wireless chipset, or security policy will work. Use current known-issues guidance and keep a fallback rather than changing unfamiliar firmware controls at the last moment.
- Use a one-time menu to boot Tails from USB.
- Test the exact USB port and firmware entry.
- Practice from a complete shutdown.
- Retest after firmware updates or computer changes.
Booting Tails from USB FAQ
Why does Windows start instead of Tails?
The computer selected its internal boot manager. Restart and explicitly choose the USB from the one-time boot menu.
Which boot key should I use?
It depends on the manufacturer and model. F12, F9, F10, F11, and Esc are common, but consult the device documentation.
Should I disable Secure Boot?
Follow current official Tails guidance for your release and hardware instead of changing security settings preemptively.
Can a USB hub prevent Tails from booting?
Yes. Firmware may not initialize hubs or docks early enough. Connect the drive directly to the computer.
Why is the USB listed twice in the boot menu?
Firmware can expose separate UEFI and legacy entries for the same removable device. Current Tails guidance and the computer's firmware mode determine the appropriate choice. Start with the UEFI-labelled removable entry when it matches the official instructions, and avoid changing legacy-mode settings without a reason.
Can I remove the USB after the Tails welcome screen appears?
No. Tails continues running from the removable media during the session. Removing it can interrupt applications, damage persistent data, or stop the system. Leave the drive connected until Tails has shut down and the computer indicates that removal is safe.
Technical facts and downloads should be confirmed against the official Tails documentation. This independent guide does not host or modify Tails images.