
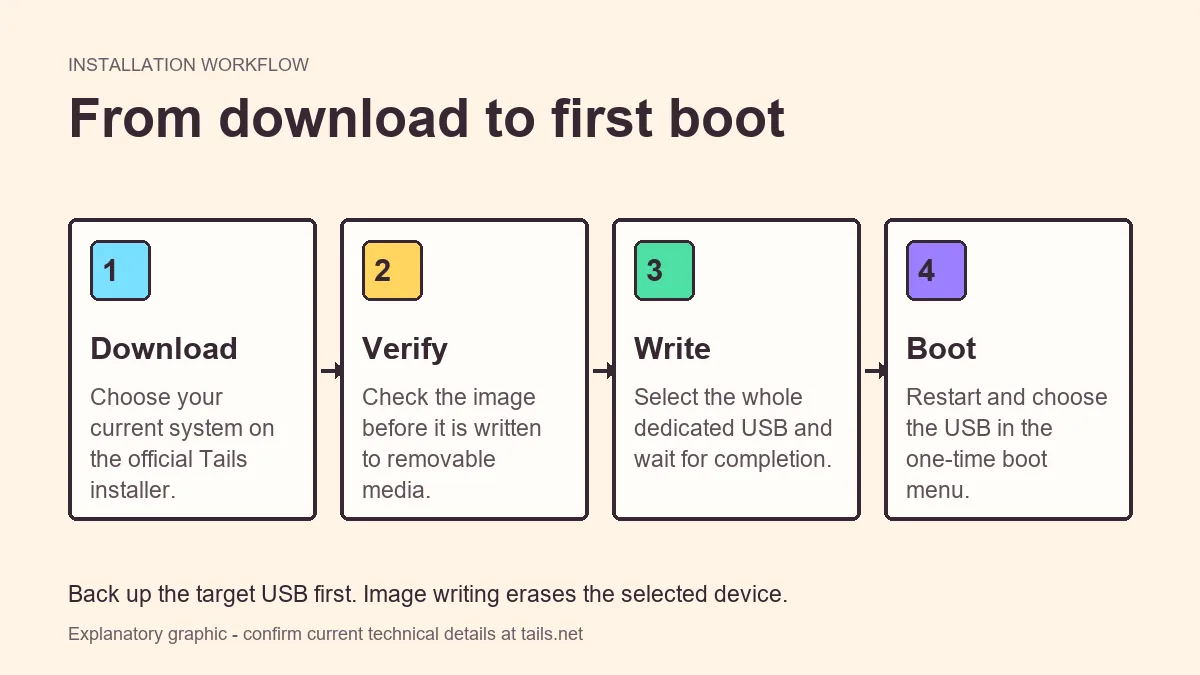
Back up a dedicated USB drive, download Tails through the official installer for your current operating system, verify the image, write it to the entire USB device, then restart and select that USB from the one-time boot menu.
Understand what installing Tails means
Tails is a live operating system. The standard setup writes a complete disk image to a USB stick and starts from that removable device. It does not install applications into your current Windows, macOS, or Linux desktop.
Avoid attempts to install Tails permanently on an internal hard drive. That is outside the intended workflow and can undermine the amnesic design or erase the wrong disk.
- The USB becomes a boot device, not a normal folder of files.
- Your installed operating system stays on its internal disk.
- Persistent Storage is optional and is configured after the USB boots.
Choose the instructions for your current computer
The download is the same project, but verification tools, image writers, security prompts, and startup keys differ by platform.
| Current system | Recommended guide | Important check |
|---|---|---|
| Windows | Tails for Windows | Confirm the removable drive letter and capacity |
| macOS | Tails for Mac | Check Mac model and processor compatibility |
| Linux | Tails for Linux | Confirm the whole device path, not a partition |
Install Tails on the USB
Complete these stages in order. Do not skip verification or disconnect the device while the writer is still finalizing data.
- 1
Prepare and identify the USB
Move its existing files elsewhere, disconnect unrelated external disks, and note the USB capacity.
- 2
Download from tails.net
Use the official platform installer so the file and instructions stay paired.
- 3
Verify the image
Use the official verification flow. A failed check means the image should not be written or used.
- 4
Write the whole image
Select the image and the USB device in the recommended tool, then wait until writing and any verification stage finish.
- 5
Restart into the USB
Open the one-time boot menu, choose the removable device, and wait for the Tails welcome screen.
The image writer overwrites the target. Check device name, capacity, and removable status immediately before confirming.
First boot and Persistent Storage
At first boot, review the welcome options before connecting. Only enable settings you understand. Once Tails starts successfully, you can create Persistent Storage from the built-in tools if you need selected data to survive reboots.
Persistence is not a general substitute for backups. Store recovery information safely and understand which features are configured to persist.
- Test networking and keyboard layout.
- Apply available Tails updates through official mechanisms.
- Create Persistent Storage only after a successful baseline boot.
- Keep a separate backup of important persistent data.
If Tails does not start
Return to the earliest uncertain stage. Verify the file again, confirm the writer completed, try a direct USB port, and make sure the computer actually selected the USB at startup.
A black screen or hardware failure can be device-specific. Record the computer model and graphics hardware before consulting current known-issues documentation.
- USB absent from boot menu: change port and review firmware settings.
- Normal OS starts: use the one-time boot menu instead of relying on boot order.
- Verification fails: delete the image and download it again.
- Welcome screen freezes: check known hardware issues and graphics workarounds.
Validate the installation before relying on it
A visible welcome screen confirms that the USB can start, but a dependable installation test goes further. Check the keyboard layout, display scaling, network adapter, clock, and any accessibility device you expect to use. Open the included applications needed for your workflow and confirm that large files or browser activity do not exhaust the available memory.
Restart at least once after creating Persistent Storage and confirm that only the intended features persist. Learn how the storage is unlocked and how failure is presented. Do not store the only copy of a key, document, or recovery code on the same flash device that runs the operating system.
Record the computer model, startup key, working USB port, and any current official workaround in a separate secure note. This small runbook is useful when a firmware update, replacement USB, or stressful situation makes the normal startup sequence less obvious. Recheck official release notes before future use.
- Complete a full cold boot, not only a restart.
- Test the network and required peripherals.
- Restart and test intended persistent features.
- Keep recovery material outside the Tails USB.
- Document the working boot-menu sequence.
How to install Tails OS as a repeatable process
Learning how to install Tails OS is easier when the workflow is recorded as four separate decisions: obtain the official image, verify the local file, write the entire dedicated USB, and select that removable device at startup. If a later boot fails, this separation identifies the last known-good stage instead of encouraging random firmware changes.
Anyone documenting how to install Tails OS for a team or future self should record the source URL, verification result, USB model, computer model, successful port, and boot-menu key. Do not record a fixed Linux device path or a guessed version number because both can change. Link back to current official instructions so the procedure has an update path.
After you install Tails OS, perform two cold boots and one normal return to the installed operating system. Test the network and required peripherals, then restart after configuring Persistent Storage. This proves more than a single welcome screen and helps distinguish installation success from application, storage, or hardware problems.
- Use official instructions whenever you install Tails OS.
- Record the verified source and successful boot-menu sequence.
- Test persistence only after a clean baseline boot.
- Keep recovery information and backups outside the Tails USB.
Installing Tails OS FAQ
Can I install Tails on my hard drive?
The intended workflow is a live USB. A permanent internal-disk installation is not the normal supported design.
Does installing Tails delete Windows or macOS?
Not when you select the correct removable USB target. Selecting the internal disk by mistake can erase it, so check carefully.
Do I need two USB sticks?
Follow the current official instructions for your platform; the required media can change with the installation method.
Can I use Tails immediately after writing it?
Restart, boot from the USB, and confirm the welcome screen. Complete any current update and compatibility checks before depending on it.
Technical facts and downloads should be confirmed against the official Tails documentation. This independent guide does not host or modify Tails images.