
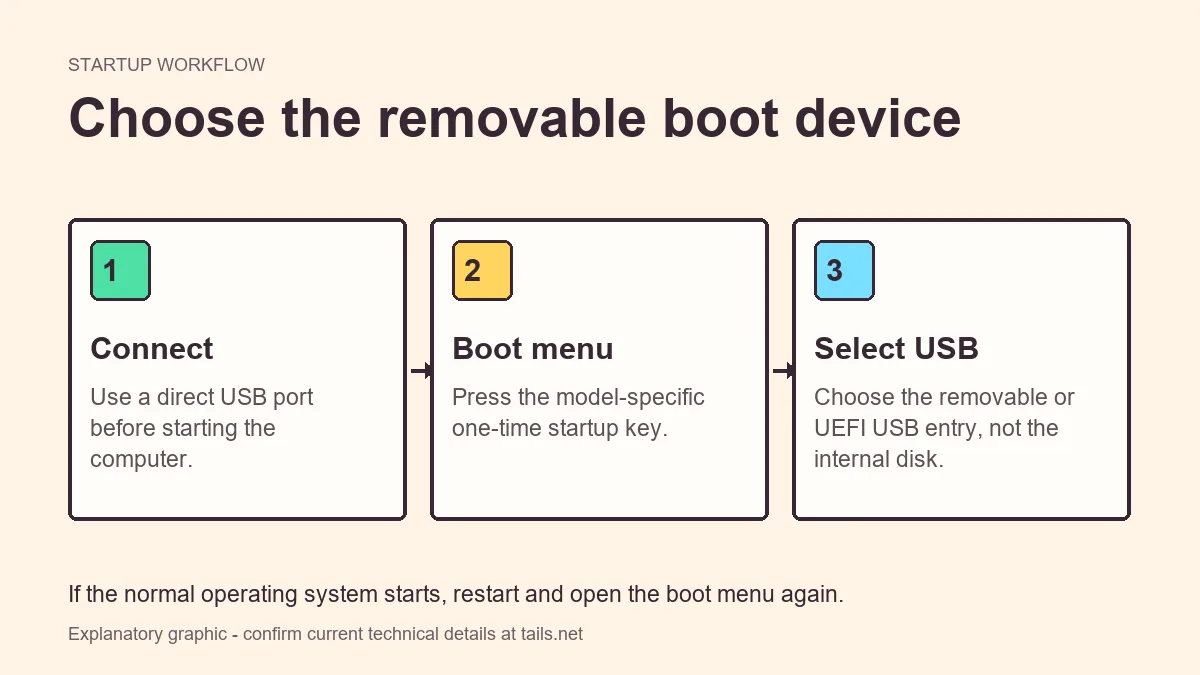
If Tails USB is not booting, shut down completely, connect the drive directly, open the computer's one-time boot menu, and select its USB or UEFI entry. If the drive is missing, check the image write and another USB port. If a boot entry appears but startup stops, record the exact screen, re-verify the image, and compare the computer model with current official known-issues guidance before changing Secure Boot or other firmware settings.
Start with the symptom, not a random fix
The phrase Tails USB not booting can describe several different failures. A computer that never lists the drive has a detection or write problem. A computer that lists the drive but immediately starts Windows or macOS has a selection problem. A machine that shows a loader and then freezes has a different path again, often involving graphics, firmware, peripherals, or a damaged image.
Write down whether the USB appears, the label shown, whether the internal system starts, whether the screen becomes black, and whether the failure happens on one computer or several. This prevents circular troubleshooting.
Do not begin by disabling security features or changing permanent boot order. Confirm the media, use temporary boot selection, test a direct port, and only then investigate model-specific firmware behavior.
- USB missing entirely: check the write, port, adapter, and drive detection.
- USB listed but ignored: choose the removable or UEFI entry explicitly.
- Black screen or freeze: note the last visible screen and test a clean rewrite.
- Failure on several computers: suspect the image write, USB media, or verification step.
| What you see | Most likely area | Safe first action |
|---|---|---|
| No USB entry | Detection or failed write | Try a direct port and confirm the write completed |
| Windows or macOS starts | Wrong boot entry | Restart and choose the USB or UEFI entry |
| Logo then black screen | Graphics, firmware, or damaged media | Record the screen and test a verified rewrite |
| Works elsewhere only | Computer-specific compatibility | Compare model, ports, firmware, and current known issues |
Prefer a one-time boot menu and a direct USB connection. Avoid permanent boot-order edits until the removable media and the computer's compatibility are understood.
Confirm the USB was written correctly
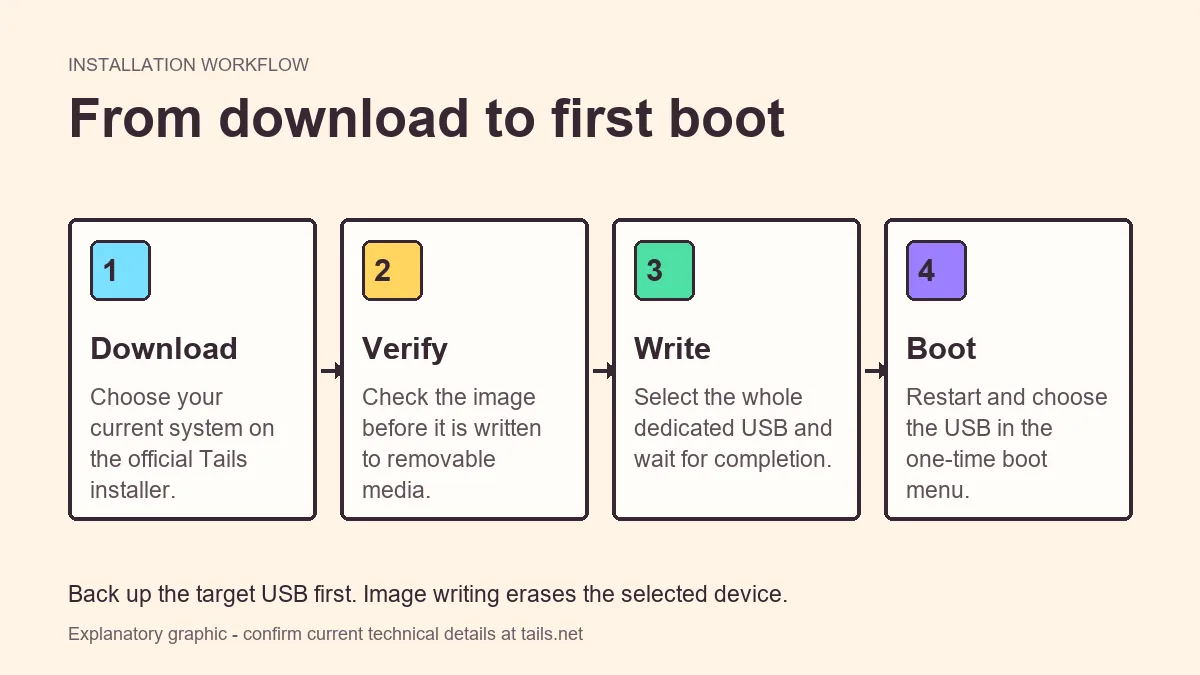
A USB can contain files and still fail to boot. Tails expects the official image-writing workflow, not a normal drag-and-drop copy. If the writer reported an error, was interrupted, or targeted the wrong removable disk, firmware may show an empty, generic, or non-bootable device. A drive that looks full in File Explorer or Finder is not proof that the boot structure is correct.
Before rewriting, copy off any files you still need because image-writing normally replaces the USB's existing layout. Reopen the official installation instructions, confirm the current platform, complete the offered verification step, and test another known-good drive if the same USB fails on more than one computer.
- Use the official Tails USB workflow for the current platform.
- Verify the downloaded image before writing when the official instructions provide that step.
- Select the whole removable drive, not a folder or an internal partition.
- Disconnect spare external disks so the target is easier to identify.
- 1
Back up the drive
Move any personal files to a different location before an image write or reformat.
- 2
Check the source and verification
Use the official source and the current verification method instead of an old mirror or an unverified archive.
- 3
Rewrite once, carefully
Choose the dedicated USB by its model and capacity, then wait for the writer to finish and report success.
- 4
Test the result
Use a direct port and the one-time boot menu. If it still fails, compare with another drive or computer.
When the USB is missing from the boot menu
If the removable drive never appears, begin with physical detection. Shut the computer down completely, remove hubs and docks, and connect the USB directly. Try another port, especially a port on the opposite side or a different USB generation. Some firmware initializes only a subset of ports before the operating system loads. If the drive has an activity light, treat it as a clue, not proof that the firmware recognized a bootable device.
Next, inspect the image-writing result and the device name. A boot menu may show a manufacturer name, a capacity, USB HDD, Mass Storage, or a UEFI entry instead of the word Tails. Disconnect other external storage temporarily so a similar label cannot be mistaken for the Tails drive. If the drive appears on another compatible computer, the problem is more likely computer-specific than a missing image.
If no computer detects the drive after a verified rewrite, replace the USB with a dedicated known-good drive. Intermittent media can create failures that look like firmware problems.
- Use a direct port without a hub, dock, monitor, or keyboard passthrough.
- Try the port that the computer uses for other bootable media.
- Look for UEFI, USB HDD, Mass Storage, the manufacturer name, or the drive capacity.
- Test the media on a second compatible computer before declaring the computer faulty.
Black screen, freeze, or failure after the loader
A black screen after selecting the USB is different from a USB that never appeared. Note whether you saw a Tails loader, a welcome screen, a cursor, a warning, or only a blank display. Remove unnecessary peripherals and retry from a cold boot. Then test the same verified USB on another compatible computer if possible. This separates a damaged write from a graphics or firmware compatibility issue.
Avoid copying kernel options from an old forum post without checking current official known-issues guidance. Record the computer model, graphics hardware when known, firmware mode, port, and last visible screen; those details are more useful than 'it does not work.' If only one computer fails, follow model-specific guidance. If every computer fails at the same stage, return to source verification, the writer result, and the USB media.
- Remove hubs, docks, extra monitors, and unneeded USB devices.
- Try a full shutdown rather than sleep or a fast restart.
- Record the last visible screen and any exact error text.
- Test on a second compatible computer.
- Use current official known-issues guidance for model-specific workarounds.
Secure Boot, UEFI, and other firmware boundaries
Secure Boot and UEFI can affect whether a removable system starts, but they are not universal explanations for every failed Tails boot. A missing USB entry, a wrong boot choice, and a black screen have different causes. Treat the firmware setting as one hypothesis and compare it with the current official Tails instructions for your release and computer model.
Before changing a firmware setting, record the original value and make sure you know how to restore it. Changing Secure Boot, legacy compatibility, or permanent boot order can alter how the installed system starts. If official guidance requires a change, make the smallest reversible change and test the USB.
A Tails USB that boots on one computer is not a universal compatibility certificate. Hardware policies, graphics, firmware, and removable-media settings vary. Troubleshooting should produce a documented path for the specific machine, not a collection of guesses.
- Check current official instructions before changing Secure Boot.
- Record firmware settings before editing them.
- Prefer temporary boot selection over permanent boot-order changes.
- Change one firmware variable at a time.
- Restore settings carefully and confirm the installed operating system still starts.
Do not disable firmware protections simply because a generic guide suggests it. Match any change to the current official Tails documentation and your exact hardware.
Know when to stop and replace the test path
Replace the USB when verification repeatedly fails, it disappears on multiple computers, its capacity is inconsistent, or it produces unrelated read errors. If policy prevents removable booting on a managed computer, ask the administrator rather than bypassing controls.
- Replace media that fails verification or disappears across computers.
- Respect managed-device policy and do not bypass administrative controls.
A safe Tails USB recovery checklist
Classify the failure first. If the USB is absent, check the writer, verification, direct port, and media. If it is visible but ignored, use the one-time boot menu and choose the removable or UEFI entry. If the loader stops, record the screen and compare a clean rewrite on another computer.
- Verify the source and write before blaming firmware.
- Use a direct port and a one-time boot menu.
- Record the last visible screen and exact error.
- Follow current official Tails guidance for Secure Boot and hardware workarounds.
Tails USB Not Booting FAQ
Why does my computer ignore the Tails USB?
The drive may not have been written correctly, the port may not be initialized early, or the menu may hide it under a manufacturer or UEFI label. Try a direct port, confirm verification, remove other drives, and check again.
Why does Windows start instead of Tails?
The computer selected its internal boot manager. Restart and choose the removable drive or its UEFI entry. Do not choose Windows Boot Manager or the internal SSD.
Should I disable Secure Boot when Tails will not start?
Not automatically. Check the current official Tails instructions for the exact release and computer model, record the original setting, and make only a small reversible change if the official guidance requires it.
Why is Tails stuck on a black screen?
The failure may happen during graphics initialization or a damaged write. Note the last screen, remove peripherals, try a cold boot, and compare a verified rewrite on another computer.
Can a USB hub or dock prevent Tails from booting?
Yes. Firmware may not initialize a hub, dock, monitor, or keyboard passthrough early enough. Connect the Tails USB directly to the computer and test another port.
Technical facts and downloads should be confirmed against the official Tails startup documentation. This independent guide does not host or modify Tails images.